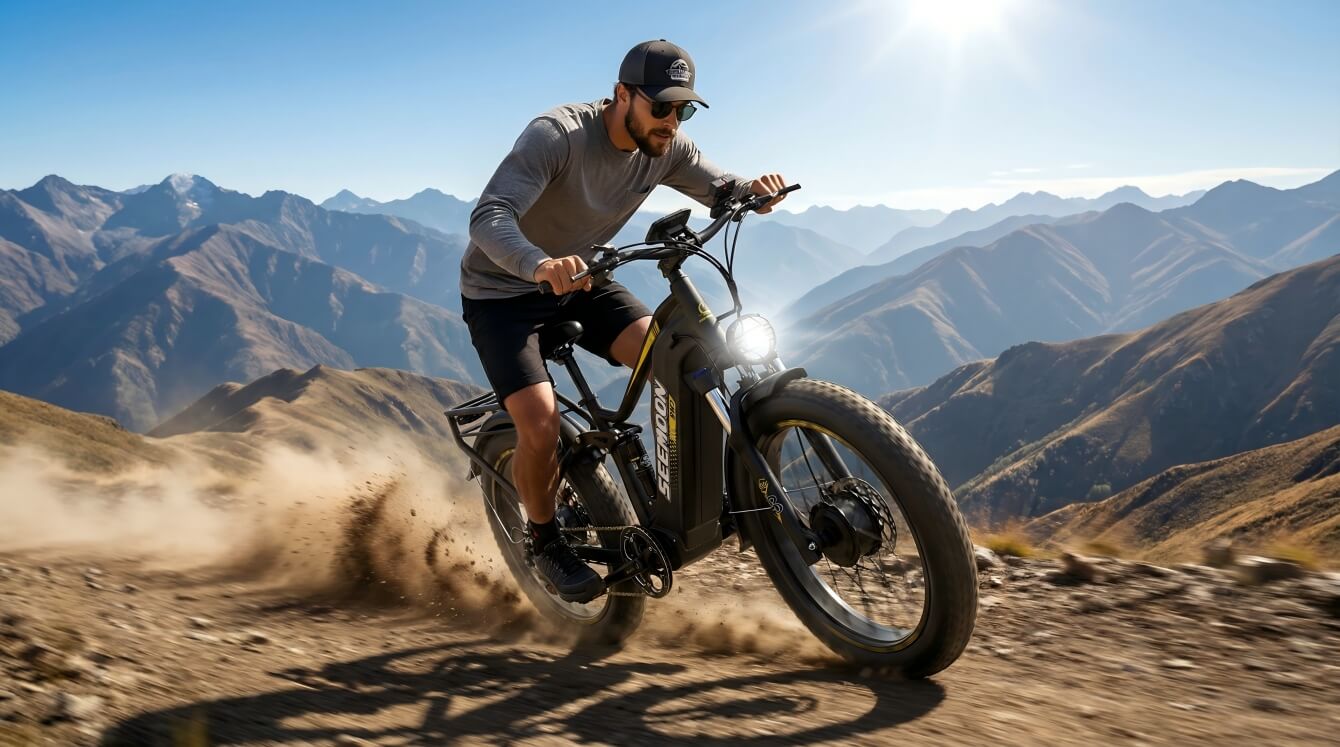
There is a distinct, visceral moment of hesitation when you first stand next to the Seemoon SM3. It isn’t just a bicycle; it has presence. With its moto-style dual suspension and imposing stance, it commands respect. And the second you grab the handlebars to lift it, reality sets in: at 107 lbs (48.5 kg), this machine is dense. Most e-bike reviews conveniently gloss over the physics of weight. They try to fool you with specifications such as unparalleled top speed and high-voltage battery architecture, but they rarely explain what it’s actually like to wrestle a heavyweight chassis through six inches of fresh Minnesota powder or traverse the loose silica sand of the Florida coast.
At Seemoon, we practice Radical Transparency. We don’t hide the numbers. Yes, the SM3 is heavy—and it is heavy by design. That mass isn't dead weight; it is the structural cost of performance. It is the necessary heft of a massive 1800Wh battery, high-torque dual motors, and a reinforced, torsion-resistant frame capable of maintaining stability at highway speeds. In the world of high-performance PEVs (Personal Electric Vehicles), weight isn't just a number to be feared—it is a tool to be mastered.
In this comprehensive technical guide, we are moving beyond the spec sheet. We will teach you how to leverage that mass to your advantage for superior traction and momentum. We’ll break down:
-
The Utility of Walk Mode: How to maneuver without the strain.
-
Tire Flotation Physics: Why a heavier bike can actually perform better in loose terrain when PSI is dialed in.
-
The "Cold Tax": Understanding battery chemistry and range management in freezing temperatures.
-
Logistics: The practicalities of transporting a 100+ lb machine on a vehicle.
Taming the Titan: How to Handle and Haul Your 100lb+ E-Bike
Let’s address the elephant—or rather, the tank—in the room. The SM3 is a powerhouse, but with a curb weight of 107 lbs (48.5 kg), it demands respect. Maneuvering this machine isn't like handling a standard 30-lb analog road bike. If you attempt to manhandle it out of a muddy rut or lift it using only upper-body strength, you aren't just risking bike damage—you’re risking a lumbar strain.
To live comfortably with a heavy-duty, dual-motor e-bike, you need to work smarter, not harder. Here is the technical breakdown on how to handle the weight on the trail and on the road.
1. The "Walk Mode" Savior
Why it matters: Many riders skip the manual and ignore this feature, but on a heavy dual-motor bike, Walk Mode is not a luxury—it is an operational necessity. The Physics of the Struggle: Imagine you are climbing a steep, icy incline (15% grade) and lose traction. You plant a foot down. Now you are stopped dead. Pushing the bike manually isn't just heavy; it feels like the wheels are stuck in glue. This is due to cogging torque—the magnetic resistance generated by the permanent magnets in the dual motors passing over the stator coils when unpowered. You are fighting gravity and the magnets.
The Protocol: Instead of straining your back, let the system do the work.
-
Engage: Press and hold the "-" (Minus) button on the control pad for 3 seconds.
-
Assist: The controller delivers a low-amperage current to the motors, propelling the bike at a steady, torque-managed pace of 3.7 mph (6 km/h). It feels like an invisible hand pushing the bike up the hill for you.
⚠️ Pro Safety Tip: When using Walk Mode, keep two fingers hovering over the brake levers. The torque is significant. If the bike hits a patch of dry pavement and surges, a feather-light tap on the brake lever engages the motor cutoff switch, instantly killing power.
2. Transporting the Beast: The Rack Reality
One of the most frequent inquiries we receive is: "How do I get this monster to the trailhead?"
The "Strap Rack" Danger: Do not use a standard trunk-mounted strap rack or a roof rack designed for acoustic bikes. These are typically rated for a static load of 35-40 lbs per bike.
-
The Risk: A 107 lb SM3 exerts massive dynamic force when your car hits a pothole at highway speeds. A standard rack will likely fail, causing severe damage to your vehicle’s bumper, or worse, ejecting the bike into traffic.
The Hardware Solution: You need a platform-style hitch rack specifically rated for heavy e-bikes or light motorcycles.
-
Specs to look for: Ensure the rack is rated for 120 lbs+ per tray.
-
Hitch size: We strongly recommend a 2-inch hitch receiver (Class III or higher) to minimize rack wobble.
The "Weight-Shedding" Protocol: Before lifting the bike onto the rack, remove the battery.
-
The Math: The battery weighs approximately 15 lbs. removing it drops the bike's curb weight to ~92 lbs.
-
The Benefit: This not only makes the lift significantly more manageable but also reduces the torque load on your vehicle's hitch during transit.
2. Mastering the Physics of Floatation: Snow & Sand Tactics
The defining characteristic of the SM3 is its massive 26 x 4.0” fat tires. However, raw volume is only half the battle. To conquer soft-load surfaces like powder or silt, you must master the relationship between tire deformation and ground pressure.
The "Pizza Cutter" vs. The "Snowshoe" Effect
Understanding the physics of the Contact Patch is the difference between effortless gliding and an afternoon spent pushing a 100 lb bike through a drift.
-
High Pressure (20-25 PSI): At high inflation, the tire profile remains "crowned" (round and rigid). This concentrates the combined mass of the bike and rider into a narrow, vertical sliver. On soft terrain, this creates a "Pizza Cutter" effect: the tire slices through the surface crust, digging a trench until the bike bottoms out.
-
Low Pressure (5-8 PSI): Reducing PSI allows the tire casing to "pancake." This lateral and longitudinal expansion increases the surface area of your contact patch by nearly 200%. By spreading the load over a larger area, you achieve Floatation—essentially acting like a snowshoe to stay atop the surface rather than sinking into it.1

Precision PSI: The Terrain Deployment Guide
In the world of fat biking, "eyeballing" your pressure is a rookie mistake. A PSI variance can be the difference between traction and a washout. Always use a high-quality digital low-pressure gauge.
| Terrain Type | Rec. Pressure (PSI) | Technical Goal | Operational Risk |
| Pavement / Hardpack | 20 – 25 PSI | Minimize rolling resistance; maximize battery range. | "Chatter" or harsh ride quality on bumps. |
| Gravel / Dirt Trails | 12 – 18 PSI | Mechanical grip and vibration damping (small bump compliance). | Increased rolling resistance vs. pavement. |
| Deep Sand / Fresh Snow | 5 – 8 PSI | Maximum Floatation. Disperse weight to stay on the surface. | Rim Strike (see below). |
| Sheet Ice | 5 – 10 PSI | Maximize surface contact. Note: Use studded tires for ice. | Rubber loses chemical grip in sub-zero temps. |
Before we hit the trails, make sure your bike is technically ready. Check [ SM3 High-Energy Electric Bicycle Comprehensive Guide]
3. The Physics of Traction: Why Dual-Hub AWD Beats RWD
Standard e-bikes typically utilize a Rear-Wheel Drive (RWD) configuration. While efficient on tarmac, RWD faces a fundamental physics deficit in "low-shear" environments like deep sand or fresh powder. In these conditions, the front wheel acts as "dead weight," creating a plowing effect where rolling resistance exceeds the rear tire's frictional grip. The result? The rear wheel oscillates, digs a hole, and loses momentum.
The SM3’s All-Wheel Drive (AWD) system shifts this paradigm by utilizing a synchronized dual-motor output. Here is how it handles the "Tractor" effect:
The "Climb" Factor: Overcoming Rolling Resistance
In a traditional RWD setup, the front tire is pushed into the substrate. With the SM3’s AWD engaged, the front motor generates instantaneous torque, allowing the leading tire to "claw" its way onto the surface rather than digging into it.How should I choose between a single-motor and dual-motor e-bike? Please read the blog post [How to Choose the Best Off-Road E-Bike: Dual Motor vs. Single Motor] to understand the differences between single and dual motors and how to choose in actual riding.
-
Vertical Lift: The front motor provides a pulling force that assists in lifting the bike’s geometry over obstacles.
-
Total Traction Management: By distributing the load across two contact patches, the SM3 reduces the likelihood of "spin-out" on the rear tire.

Correcting Understeer in Loose Terrain
One of the biggest challenges in off-road cycling is understeer—where you turn the handlebars, but the bike continues traveling straight because the front tire has lost lateral grip.
-
Powered Vectoring: In AWD mode, a "throttle blip" during a turn introduces active pulling force to the front wheel. This creates a localized traction bite, physically pulling the front end into the line of the turn.
-
Stability Control: This dual-drive synchronization ensures that the bike remains "planted," providing the rider with a level of predictable handling that single-motor bikes simply cannot replicate.
Technical Deep Dive: Curious about how we manage the power draw between two high-torque motors? Explore the nuances of voltage sag and efficiency in our guide: [High voltage and Standard voltage Engineering Explained].
4. Master Your Suspension: Engineering the "Magic Carpet Ride"
Most riders treat the SM3’s front suspension fork as a "set it and forget it" component. In reality, failing to tune your fork means leaving roughly 50% of your bike’s performance on the table. Suspension is often marketed as a luxury for comfort, but in the world of high-performance e-biking, suspension is actually about Traction. A wheel bouncing off the pavement is a wheel with zero grip. By mastering your fork’s settings, you ensure your tires stay glued to the terrain, providing better braking, sharper cornering, and a more composed ride.
The Suspension Tuning Matrix
Optimizing your fork’s compression settings allows you to adapt the bike’s geometry to the environment in real-time.
| Terrain Type | Recommended Setting | The Physics of Performance |
| Asphalt & Urban Commuting | Lockout (Closed) | Eliminates "pedal bob" and energy dissipation. By rigidizing the fork, you maximize power transfer and maintain a precise steering angle for high-speed cornering. |
| Gravel & Fire Roads | Mid-Open | Actively dampens high-frequency vibrations (chatter). This prevents "arm pump" and hand fatigue while maintaining enough stiffness for stability. |
| Technical Trails (Roots, Sand, Snow) | Fully Open | Maximizes "Small Bump Compliance." The fork tracks erratic ground contours, ensuring the contact patch of your tire never leaves the surface. |
The "Preload" Knob: Fine-Tuning Your Spring Rate
On the opposite crown of your fork, you’ll find the Preload Adjustment. Think of this as the "baseline" for your bike’s suspension. It adjusts the initial tension on the internal spring to account for rider weight.
-
Heavier Riders (200lbs+): Rotate Clockwise (+). This increases the spring rate to prevent the fork from bottoming out on heavy impacts.
-
Lighter Riders: Rotate Counter-Clockwise (-). This softens the initial stroke, ensuring the suspension is supple enough to react to smaller bumps.
Pro Tip: Dialing in the "Sag"
To achieve a professional setup, you want to aim for 15–20% Sag. When you are seated on the bike in a neutral position, the fork should naturally compress by about one-fifth of its total travel. This "negative travel" is crucial—it allows the wheel to drop into dips and potholes, maintaining constant contact with the road rather than skipping over them.
5. The "Cold Tax": Mastering Winter Battery Management
Riding through a fresh powdering of snow is nothing short of magical—but that magic comes with a physical price. In the EV world, we call this the "Cold Tax." If you take your SM3 out when the mercury dips to 30°F (-1°C) or lower, you’ll likely notice a sharp decline in available range. It’s important to understand that this isn’t a hardware defect; it’s a fundamental constraint of Lithium-ion (Li-ion) chemistry.
The Science of the Shiver
At a molecular level, cold temperatures increase the internal resistance within the battery cells. As the electrolyte fluid becomes more viscous (thicker), the movement of lithium ions between the anode and cathode slows down. This "sluggishness" means the battery has to work harder to deliver the same amount of power, leading to voltage sag and reduced capacity.
Pro Strategies to Mitigate Range Loss
To maintain peak performance when the winter wind bites, follow these professional maintenance protocols:
-
Prioritize Thermal Equilibrium (Warm Storage): Always store your battery indoors in a climate-controlled environment (ideally 65°F to 75°F). Never leave your battery in an uninsulated garage or shed overnight. Starting your ride with a "cold-soaked" core puts immediate stress on the cells.
-
The "Pre-Heat" Synergy: A battery stored at room temperature has a significant head start. Once you begin your ride, the natural kinetic heat generated by the discharge process (internal resistance working in your favor for once) helps maintain an optimal operating temperature.
-
Deploy Neoprene Shielding: Invest in a high-quality neoprene battery sleeve. Much like a wetsuit, neoprene provides a thermal barrier that traps the heat generated during discharge and protects the casing from the convective cooling effect of sub-zero wind chill.

-
Adjust Your "Range ROI" Expectations: Even with perfect management, physics wins. Expect a 20% to 30% reduction in total mileage during freezing conditions. When mapping your winter routes, always factor in this "buffer" to ensure you aren't pedaling a heavy e-bike home without assist.
Tech Tip: Never charge a frozen battery. If you’ve just finished a cold ride, let the battery stabilize to room temperature for at least an hour before plugging it in. Charging at freezing temperatures can cause lithium plating, which permanently degrades cell health.
6. FAQ: All-Terrain Riding
Q: Can I ride the SM3 on soft beach sand?
A: Yes, but only if you lower the tire pressure to 5-8 PSI. If you leave the tires at 20 PSI, you will dig in and overheat the motor.
Q: Do I need studded tires for snow?
A: For fresh powder, no. The rubber knobbies work fine. But for packed ice, absolutely yes. Rubber cannot grip ice; only metal studs can.
Q: Is it safe to submerge the motors in water?
A: The SM3 is IP54 rated (splash resistant). You can ride through shallow puddles or rain, but never submerge the motor hubs or the battery area in deep water (like a creek crossing).
Conclusion: Mastering the Heavy-Duty Paradigm
The Seemoon was not designed to be a lightweight and agile carbon fiber sports car.—and it shouldn't. It is an overland-grade utility machine engineered for high-torque performance where traditional builds fail. While a 107 lb (48.5 kg) dry weight might seem daunting in a stationary setting, it is the secret to the SM3’s kinetic dominance. On the trail, that mass converts into relentless momentum, providing a planted feel that skims over loose scree and packed snow.
To maximize this machine’s utility, remember the three pillars of heavy-duty e-biking:
-
Leverage Walk Mode: Treat the 3mph powered assist as your "ground crew" for navigating tight garage spaces or steep inclines.
-
The Flotation Principle: Lower your PSI to expand the contact patch. This allows the SM3 to "float" over soft terrain rather than digging in—essential for deep winter or sandy expeditions.
-
Manage the "Cold Tax": Lithium-ion chemistry faces reduced ion mobility in sub-freezing temps. Expect a 20-30% variance in range and store your battery indoors to maintain optimal voltage discharge.
Stop fighting the weight and start leveraging the physics. And enjoy the fact that while others are storing their bikes for winter, your riding season is just beginning.
Ready to join the all-terrain revolution? Explore the full capabilities of the SM3 today.
Share:
Under the Hood: The Engineering Science Behind the SM3's 6000W Peak Power
Folding vs. Solid Frame Fat Tire E-Bikes: Why We Chose Stability Over Portability